In this article, we will describe in detail how to balance a car wheel using a wheel-balancing machine.
You need to first understand there are 2 main types of wheel balancers for balancing car tyres.
- Static Wheel Balancers – these are simple manual devices for balancing the wheels of a vehicle. After using your tyre changing machine to change the tyre, the wheel with the tyre fitted is placed onto a spindle that is balanced on a suitable vertical supporting device. The spindle is then manually rotated and allowed to come to a standstill, which will do so with the heavier side towards the ground, suggesting that the wheel can be balanced by adding weight to the lighter upper side of the wheel.
- Dynamic Wheel Balancers – are a more automatic device for balancing the wheels of a vehicle. The wheel and tyre assembly is placed on the wheel balancing machine and it is rotated automatically with several sensors detecting the motion of the wheel. As it spins, the sensors of the machine capture the weight imperfections and indicate where the weights need to be applied, and will tell the user what the weight imbalance is, and therefore what wheel weight to add. This is a much more accurate way to balance a wheel and much faster to use for any busy tyre shop, garage or MOT Bay. Within the dynamic wheel balancer range, there are 2 sub-types of wheel balancing machines, these are:
- Semi-automatic wheel balancers need to have information about the wheel width, offset and wheel rim diameter entered by hand using the keypad on the top of the machine
- Fully automatic wheel balancers automatically capture the wheel data from measuring tools within the wheel balancer and often the hood of the machine also
The principles for balancing the wheels on each of these machines are similar but the process does differ for each of these, in this article we are focusing on the dynamic (semi-automatic and fully-automatic wheel balancers) as these tend to be the types of wheel balancing machines and methods most used in commercial tyre shops, garages, by mobile tyre fitters and found within MOT Bays.
Please ensure you know what kind of wheel balancer you have, and that you have the correct appropriate training and experience before operating a tyre machine in a commercial garage, tyre fitting business or MOT testing station
Below we describe how to prepare the wheel prior to balancing, including correct procedures for removing the old wheel weights, using the wheel balancing machine to identify areas out of balance and selecting and fitting the correct weights to re-balance the wheel ready for re-fitting to the car.
Practice safety first at all times when using professional tyre fitting and balancing machines and indeed any garage equipment, as these contain powerful motors exerting a lot of torque and can cause serious damage to wheels, tyres or to you if not used correctly.
How to prepare the wheel prior to mounting it on the wheel balancer
Initially ensure the power to the wheel balancing machine is turned off.
Firstly select the correct hub cone to the centre of the wheel rim that best fits the centre of the wheel, as this will ensure the rotation of the wheel during balancing will be true without vibration, keeping the wheel balancing process as accurate as possible.
Remove any old wheel weights from the wheel rim, either using weight pliers for knock-on steel wheel weights or a weight removal tool for self-adhesive stick-on weights for alloy wheels.
Mounting the wheel to be balanced correctly on the wheel balancing machine
Slide the cone onto the drive spindle of the wheel balancer with the conical head outward.
Next, mount the car wheel onto the drive spindle of the wheel balancer with the centre of the wheel hub over the conical portion of the hub cone, thus centring the wheel on the spindle.
The wing nut is next placed onto the end of the spindle, if it’s a quick-release one you may be able to push this quickly towards the wheel, but either way, twisting this as it gets towards the wheel will tighten this firmly, and prevents the wheel from moving or vibrating when the spindle turns.
Now power on the wheel balancing machine, which will light up and initialise the control panel.
You can now enter the offset, width and diameter information.
Setting the wheel offset measurement
Pull out the wheel measurement scale from the body of the wheel balancer and press it against the inside of the wheel rim to get the wheel rim offset measurement.
On a semi-automatic wheel balancer press letters A- and A+ on the control panel of the wheel balancer to increase or decrease the offset measurement displayed until the offset value on the control panel matches that of the wheel being balanced.
If this is a fully-automatic wheel balancing machine the action of moving and holding the wheel measurement scale against the wheel rim should automatically adjust the measurement to the correct figure.
Setting the wheel width measurement
On a semi-automatic wheel balancer, use the wheel width and diameter calliper tool to measure the width of the wheel rim, and this is entered using the letters B- and B+ on the control panel of the wheel balancer to increase or decrease the width measurement displayed until the width value on the control panel matches that of the wheel being balanced.
If this is a fully-automatic wheel balancing machine there is usually no need to enter a wheel width number, as this is worked out by the wheel balancer itself.
Setting the wheel diameter measurement
Checking the initial wheel balance
Lower the guard over the wheel and tyre if one is fitted to begin the spin cycle, which will usually take around 8-10 seconds before coming to a stop automatically.
On some wheel balancer machines, there is a brake pedal to bring the wheel to a stop more rapidly.
Once stopped the control panel display will show the inner and/or outer values of imbalance found on the wheel.
Open the wheel guard and manually, slowly rotate the wheel by hand, when the imbalance lights illuminate, stop moving the wheel and fit the required weights on the wheel, on the correct side as indicated by the balancing machine, and of the correct weight to correct the imbalance, and these should be fitted at the top of the wheel rim, at the 12 O’clock position.
Some wheel balancing machines will have a laser to indicate the exact area to place the wheel weight.
If this is a steel wheel then the weights used will be hammer-on ones that fit the outside lip of the wheel rim.
If this is an alloy wheel then you will be using stick-on weights that prevent damage to the rim, and do not need a hammer or excessive force to apply them.
Repeat the above manual rotation process to identify any further weights that need to be fitted to either the inside or outside of the wheel, and fit these accordingly.
Re-checking the wheel balance
Once all weights have been fitted we need to double-check everything is balanced correctly.
Lower the wheel guard to begin a second spin cycle.
All balance numbers should show zero, which indicates that the weights have been fitted correctly and the wheel is now properly balanced.
Help with your Wheel Balancing Equipment
If you are considering the purchase of a new Wheel Balancer or Tyre Machine Package and need any advice, help or finance to do so, please give our sales team at Concept Garage Equipment a call first. We can advise on the best and most appropriate Wheel Balancing machines to purchase and can also advise on or supply tyre-balancing training for you and your staff.
We can offer you advice over the phone at 0113 469 0572, we have helped to advise, build, and set up hundreds of Garage and MOT Bays across the UK and we have a huge range of garage equipment and tools. All product prices include delivery as well as free advice on the best use of the tyre fitting equipment, up to full MOT Bay packages and MOT Bay installation.
Call us today on 0113 469 0572 or use the website contact form today, we are here to help.
Wheel Balancer Machine Parts
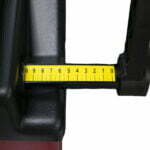
Wheel Balancer Measuring Arm
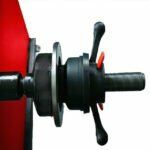
Wheel Balancer Wing Nut
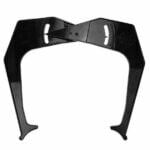
Wheel Rim Width and Diameter Caliper Tool
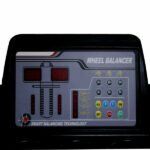
Wheel Balancer Facia LED Control Panel
Note: The parts may differ from one wheel balancer to another, these are an indication of the main parts referenced n this article.


